Xcode Conditional Compilation for Unit-Test Targets
When writing unit test cases, you need to distinguish between real use and test runs in your code from time to time. For example, you might want to send all requests to a test server, instead of the production server.
One possibility to do this is to introduce a boolean property to the class, which you use in all methods that need to differ for testing:
-(NSString *)serverUrl
{
    return (self.testing) ? kServerUrlTestServer : kServerUrlProductionServer
}
That’s what I’ve been doing until now, but I don’t like this approach. In order to be able to set the property in the test case, it has to be publicly writeable, which gives rise to potential subtle bugs in case it’s incorrectly set. A better solution would be to define a separate testing interface with a category. Still, you’d have an extra state in your class especially for the tests.
Preprocessor-Macros
Originally, I tried to use a preprocessor statement for this purpose:
-(NSString *)serverUrl
{
#if TESTING==1
#warning Testmode
    return IVTestConstants.serverUrlTestServer;
#else
    return IVTestConstants.serverUrlProductionServer;
#endif
}
I just could not figure out how to configure Xcode such that TESTING had the correct value for both, normal compilation and unit tests, though. I’ve asked this question on stackoverflow, but to no avail.
If you want to know what the difficulties were, checkout my question on stackoverflow.
Basically, it comes down to this: The unit-test target has the whole app as a target dependency, so if you define a preprocessor macro for the unit-test target, it has no effect on the source files that are compiled in the app target.
I was watching WWDC Session 401 (Xcode Core Concepts) today, and when they talked about schemes, it dawned on me that this could be the solution to my problem.
Schemes to the Rescue
So here’s how you set up Xcode:
Add a new configuration named ‘Testing’: Go to the project settings, make sure to select the project (and not a target yet). Open up the Info-pane and click the ‘+’
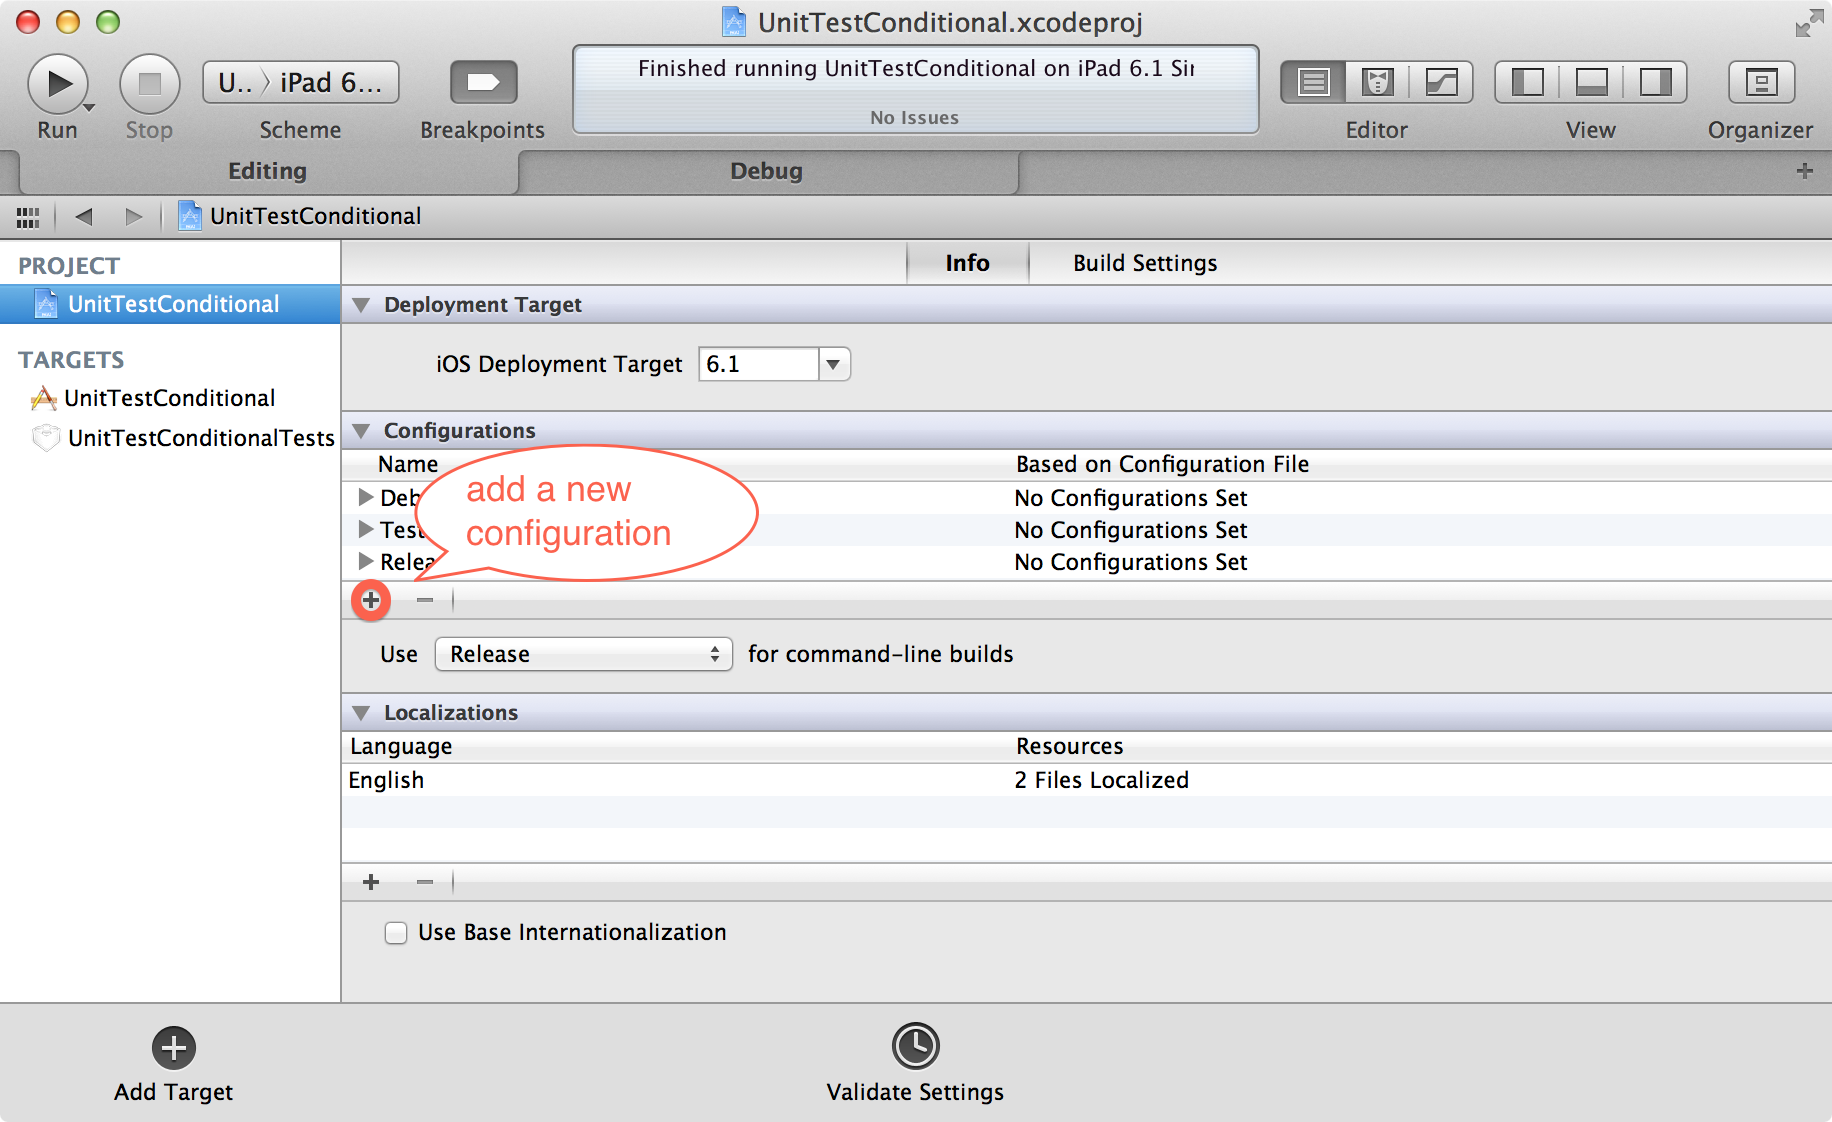 Xcode Set-Up Step 1
 Add a preprocessor macro to the build settings: Now go to the Build Target, open up the Build Settings and find the Preprocessor Macros option. Add the define TESTING=0 for the configurations Debug and Release and TESTING=1 for the configuration Testing
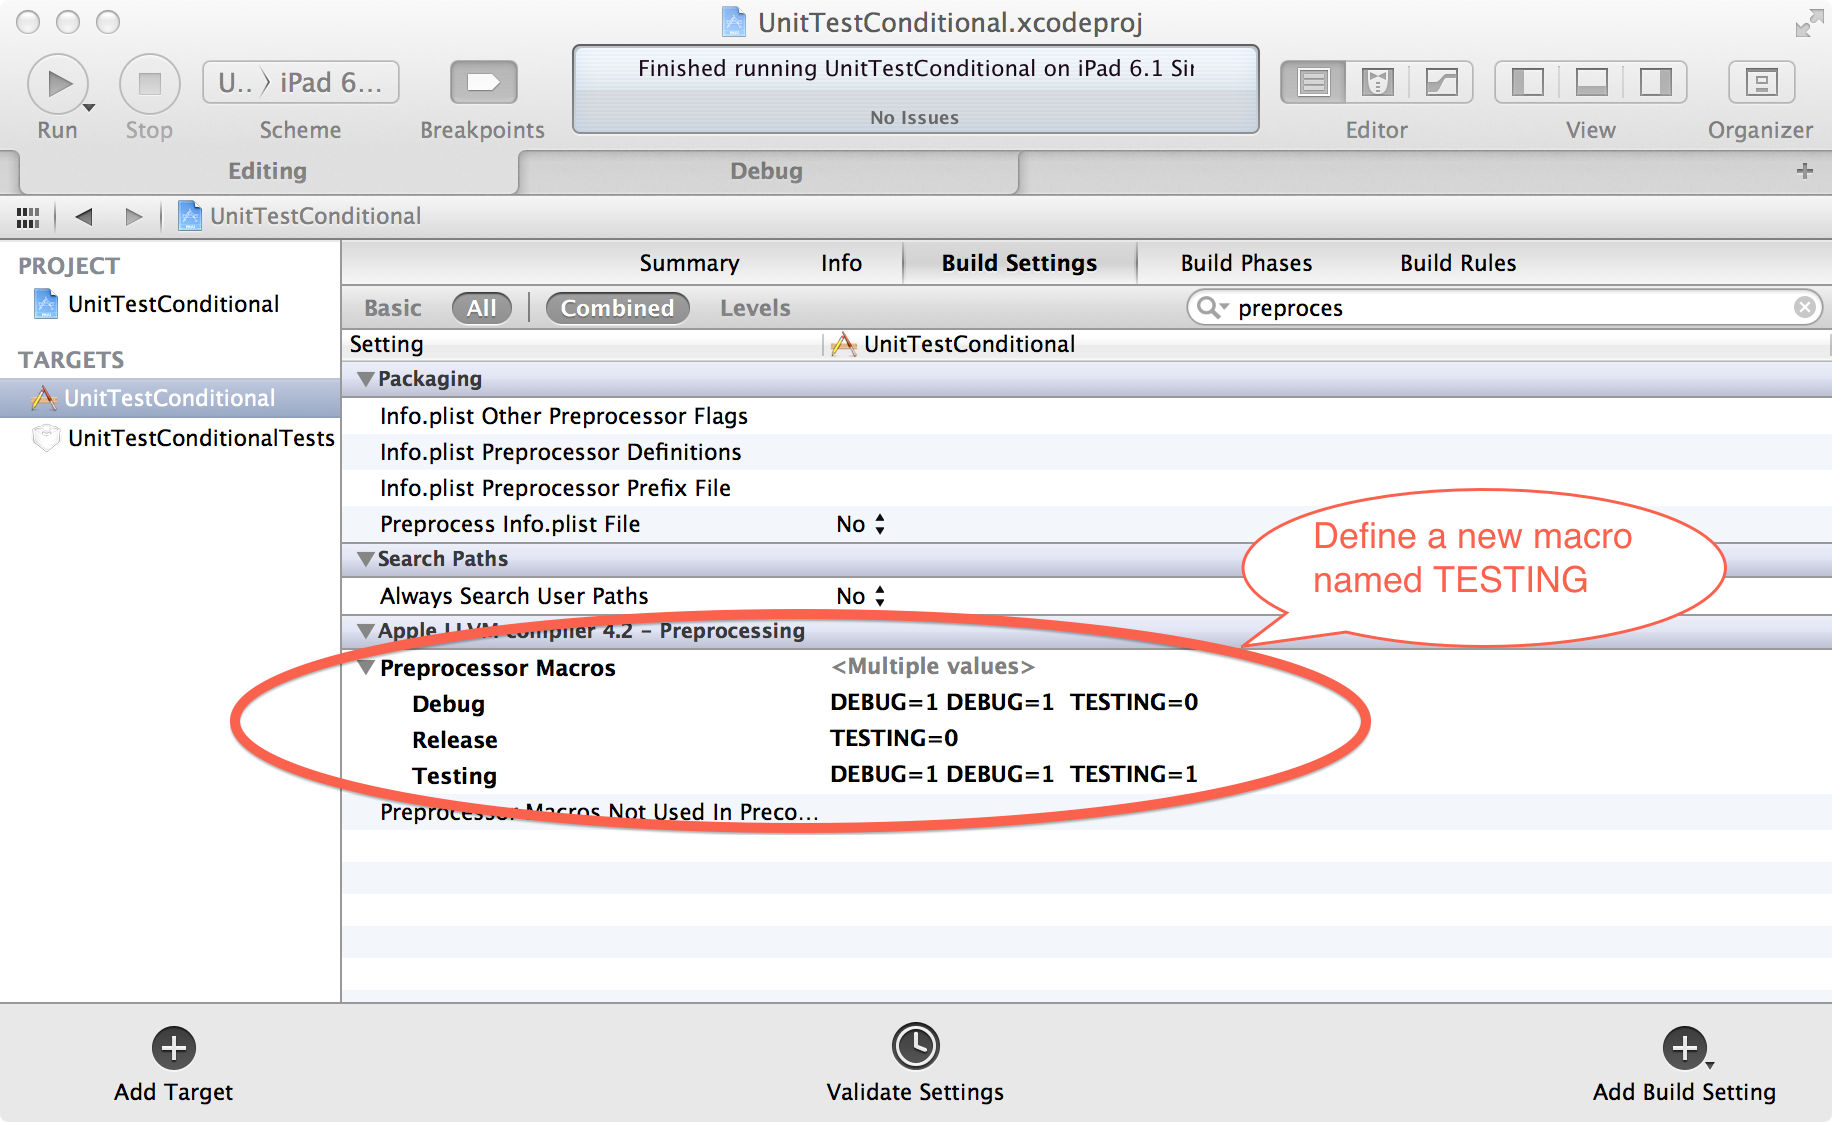 Xcode Set-Up Step 2
 Edit the test-scheme to use testing as build configuration: Open up the Edit Schemes view, select the Test scheme and choose the Info tab. As Build Configuration choose the new Testing configuration that you created in step 1.
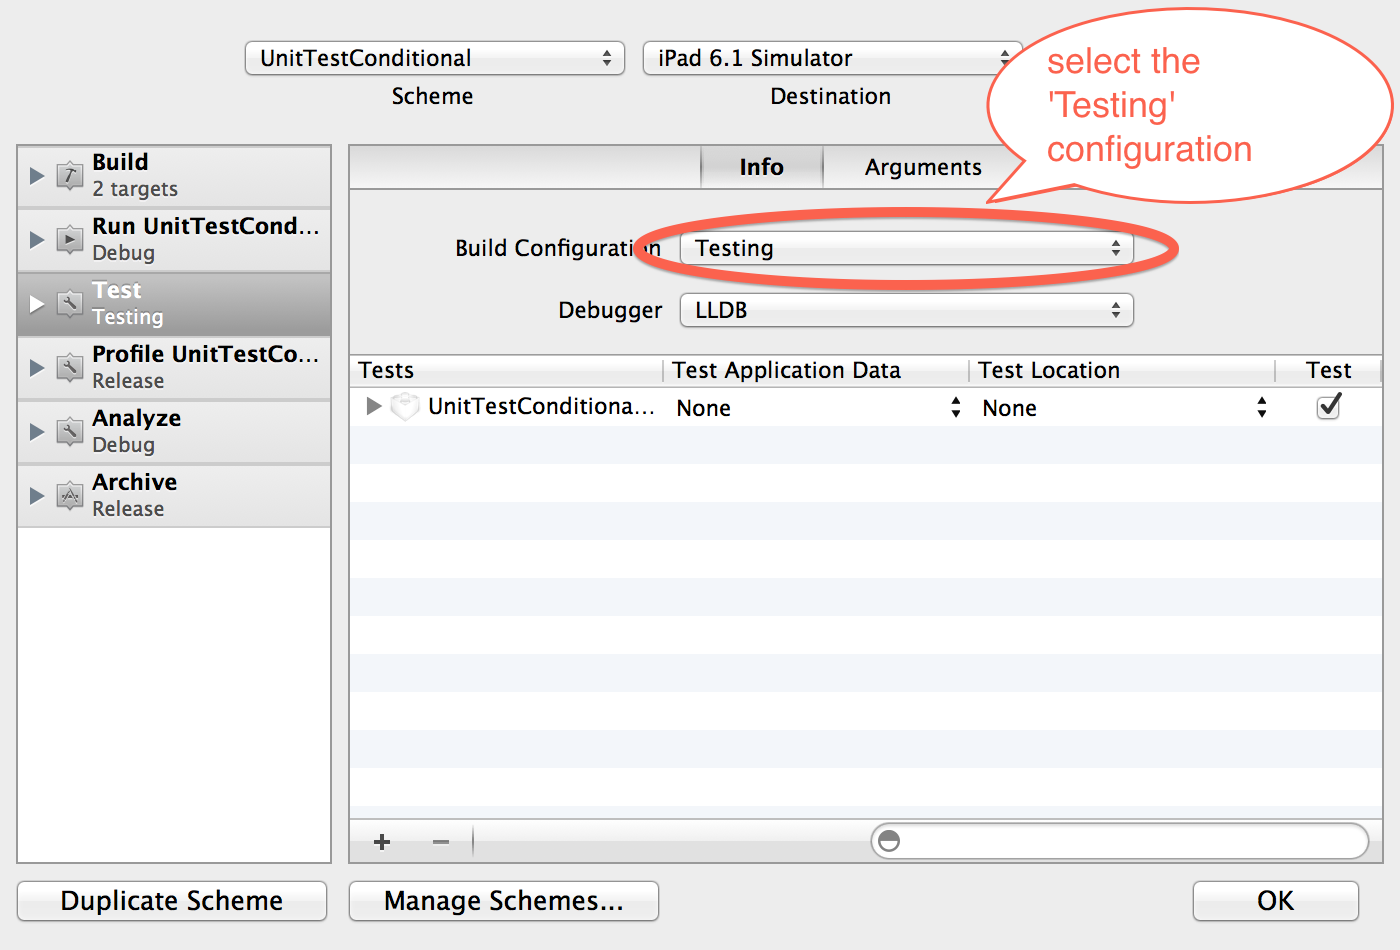 Xcode Set-Up Step 3
Voilà, thats it.
I’ve provided a simple sample project on github that demonstrates the complete set-up.
Update
I’ve recently got a mail asking about how the described set up would work with cocoapods. We didn’t use cocoapods back when I wrote this post, but we do in every project now. The setup is almost the same, except you need to edit the scheme for your workspace rather than the project AFTER you’ve run “pod install”. Following ‘pod update’ commands won’t change the workspace again, so you still need to setup the scheme only once and then you’re ready to go.

Markus Chmelar, MSc
Markus is a technical mastermind and one of the founders of Innovaptor. He studied Computer Engineering at Vienna University of Technology and contributes a valuable diversification to Innovaptor's qualifications. Markus is eager to find innovative solutions to complex problems in order to provide products that are tailored directly to the customers' needs


